Introduction
Are you new to watercolor painting and feeling overwhelmed by the array of brushes available? Don’t worry, we’ve got your back! In this beginner’s guide, we’ll be delving into the world of watercolor brushes and breaking down the different types. From synthetic to natural hair and rounds to flats, we’ll explain everything you need to know about selecting the perfect brush for your painting style. So grab a cup of tea and join us on this exciting journey as we explore the art of watercolor through its most essential tool – the paintbrush.
There are a variety of watercolor brushes available on the market, each with its own unique set of characteristics. Selecting the right brush can be a daunting task. Understanding the differences between them should help make the decision a little easier. In this article, we’ll introduce you to the different types of watercolor brushes in hopes that this will help you select the best brush for your needs.
The Different Types
As a beginner watercolorist, it’s important to understand the different types of brushes available, and what each is best suited for. In general, brushes can be divided into three categories: Round, Flat, and Filbert. Within these categories you’ll also find Detail, Rigger, Spotter and Mop brushes.
Brief Overview
Round brushes are the most versatile, and can be used for a variety of applications. Flat brushes are best suited for washes and large areas of color. Filbert brushes are a combination of both round and flat, and can be used for a variety of medium-sized area applications.
Flat Tipped Brushes
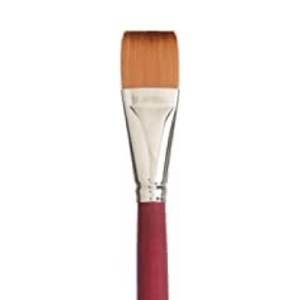
Flat Brush
- Large flat brushes can be used for washes
- Perfect for creating even layers of color.
- They can also be used to create crisp, clean lines or even dry brush effects.
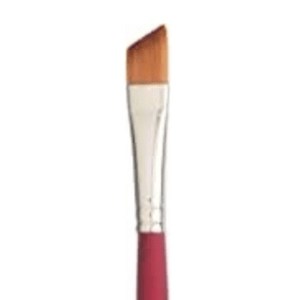
Angled Brush
A type of flat brush that —instead of being straight across— features a tip that is tapered from short to long.
- Great for painting sharp lines and -of course- angles.
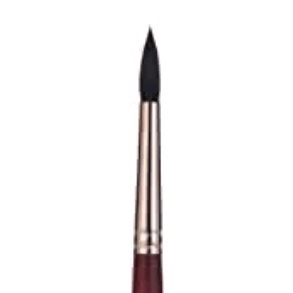
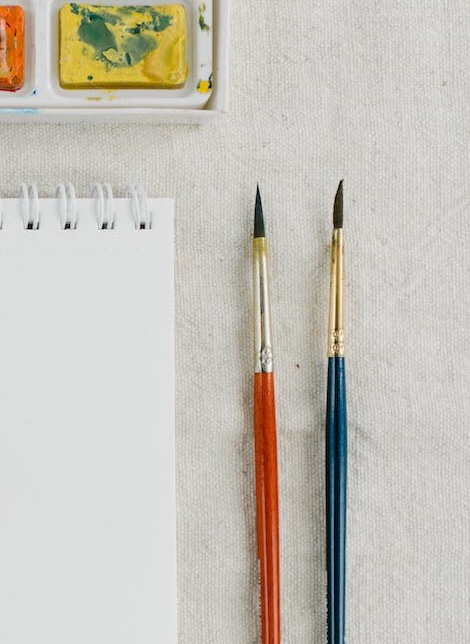
Round Tipped Brushes
- The most versatile
- The brush watercolorists use most often.
- They come in sizes 0-24
- Small round brushes are best for detailing or filling in small areas.
- Large round tipped brushes (mop brushes) are best for washes
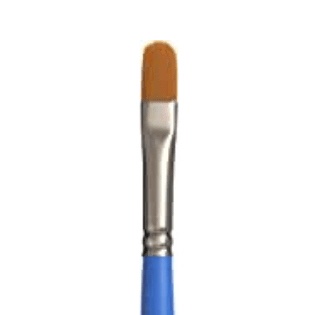
Filbert Brushes
A brush that is basically flat, but is oval shaped at the tip. It doesn’t come to a point like round tipped brushes, but because of the slightly rounded area at the bottom of the brush part, it is considered both round and flat.
- Can be even better for blending colors than flat brushes
- Good for painting plants and floral designs
Choosing the Right Brush for Your Artwork
Like I mentioned in the beginning of this article, there is a wide variety of brushes available on the market. Each is designed for a specific purpose. Choosing the right brush for your artwork is important because it can affect the overall look and feel of your painting. Now that you know more about the basic types of brushes and their shapes, another thing to take into consideration when selecting a brush is the brush size and bristles.
The size of the brush will determine how much paint it can hold and how wide or narrow your strokes will be. Bristles can be made from natural or synthetic materials, each with their own benefits. Natural bristles are usually softer and more absorbent, while synthetic bristles are stiffer and can be more durable.
Understanding Brush Sizes
When it comes to brush size, there is no one-size-fits-all answer. The size of brush you’ll need will depend on the application you’re using it for.
For example, if you’re painting fine details a 1/10 size round brush might be what you need. For line work, you’ll probably want to use a rigger brush. These are also called script or liner brushes. If you’re painting larger areas or washes, you’ll want to use a wash or mop brush like I’ve mentioned above. Ultimately, it’s up to you to experiment with different sizes and find what works best. Until you have the experience, and know what you want to do, it’s hard to know exactly what you need.
To Get Started
We recommend choosing a 10-15 piece set of inexpensive basic brushes. Just until you get a feel for what works best for you. This set should ideally include multiple rounds in various sizes, a few flats, and a few angular brushes. With these essential brushes, you’ll be able to experiment with different techniques and find the ones that work best for you before investing in more expensive or professional brushes.
Where to Purchase Watercolor Brushes
- Amazon | online
- BLICK Art Materials |online
- Cheap Joe’s Art Supplies |online
- Craft Warehouse |in-store
- their website isn’t very user-friendly and is not very well put together
- Hobby Lobby | in-store & online
- Joann |in-store, online or on the app
- Michael’s | in-store & online
- Target | in-store & online
- Walmart | in-store & online
- And sometimes eBay |online
Conclusion
Learning about the different types of watercolor brushes is an essential part of any beginner’s journey. By understanding how the materials and shapes result in unique brush strokes, artists can find a style they are confident in while experimenting with new techniques. The right brush will make your creations stand out further and play to your strengths as an artist. Hopefully, this guide has given you some insight into what goes into choosing the right watercolor brushes to help you create beautiful artwork!
Join my mailing list to learn more about art, how to create it and so much more!
Care & Maintenance
There are a few things to keep in mind when taking care of your watercolor brushes:
- Never leave your brushes submerged in water
- Use either a very mild soap or no soap and lukewarm water to clean your brushes after each painting session.
- Avoid using hot water, as this can damage the bristles.
- Very gently massage the bristles with your fingers under running water
- Rinse thoroughly until the water runs clear.
With proper care and maintenance, your watercolor brushes can last for many years of painting enjoyment!
Tips and Techniques for Working with Watercolor Brushes
When it comes to watercolor brushes, there are a few things you should know in order to get the most out of them. Here are some tips and techniques for working with watercolor brushes:
- Always use a fresh, clean brush. This will help ensure that your colors are vibrant and your brushstrokes are smooth.
- When loading your brush with paint, make sure not to overload it. Too much paint on the brush will result in coarse, streaky brushstrokes.
- To achieve fine lines and detailed strokes, use a pointed or round tip brush. These brushes are ideal for painting small areas or adding finishing touches to a painting.
- Flat tipped brushes are great for large areas of color or for creating washes of color.
- Experiment with different brushstrokes to create interesting effects. Some common strokes include stippling, scrubbing, and flicking.
- Don’t be afraid to experiment with different colors and combinations. Watercolors can be very forgiving, so don’t be afraid to try new things!